
| Documentation Contents |
Java™ Plug-in Configuration |
Applet Developer's Guide > Java Plug-in Configuration
Contents
The classic and next generation Java Plug-ins are shipped in Java SE 6 update 10 and later releases. This is to enable users to use the classic Java Plug-in if the applets exhibit different behavior in the next generation Java Plug-in. Follow the instructions for your operating system to switch Java Plug-ins.
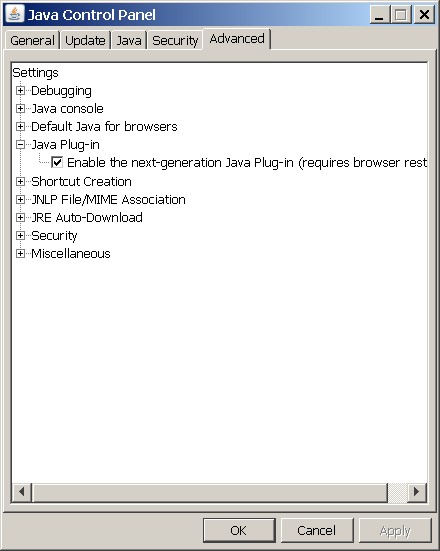
On the Windows platform only, the Java Plug-in setting can be switched in the Java Control Panel. In the Advanced tab, under the Java Plug-in node, uncheck the "Enable the next generation Java Plug-in" checkbox to use the classic Java Plug-in. Click OK and restart the browser.
On the Linux and Solaris platforms, you may have previously
created a symlink to
.../jre/lib/{i386,sparc}/libnpjp2.so into either your
Firefox 3 firefox/plugins directory or your
~/.mozilla/plugins directory.
Replace the symlink to libnpjp2.so (next generation
Java Plug-in) with a symlink to libjavaplugin_oji.so
(classic Java Plug-in). This must currently be done manually.
You can change the JREs available to your Java Plug-in for applet execution, via the Java tab in the Java Control Panel. Click View to view and change Java Runtime Settings. Check the Enabled checkbox to make a JRE available to the Java Plug-in.

Click Find to find and add JREs that may just have been unzipped and not installed via an installer.
Click Add or Remove to explicitly add or remove JREs from the list.
Copyright © 1993, 2010, Oracle and/or its affiliates. All rights reserved. Please send comments using this Feedback page. |
Java Technology |